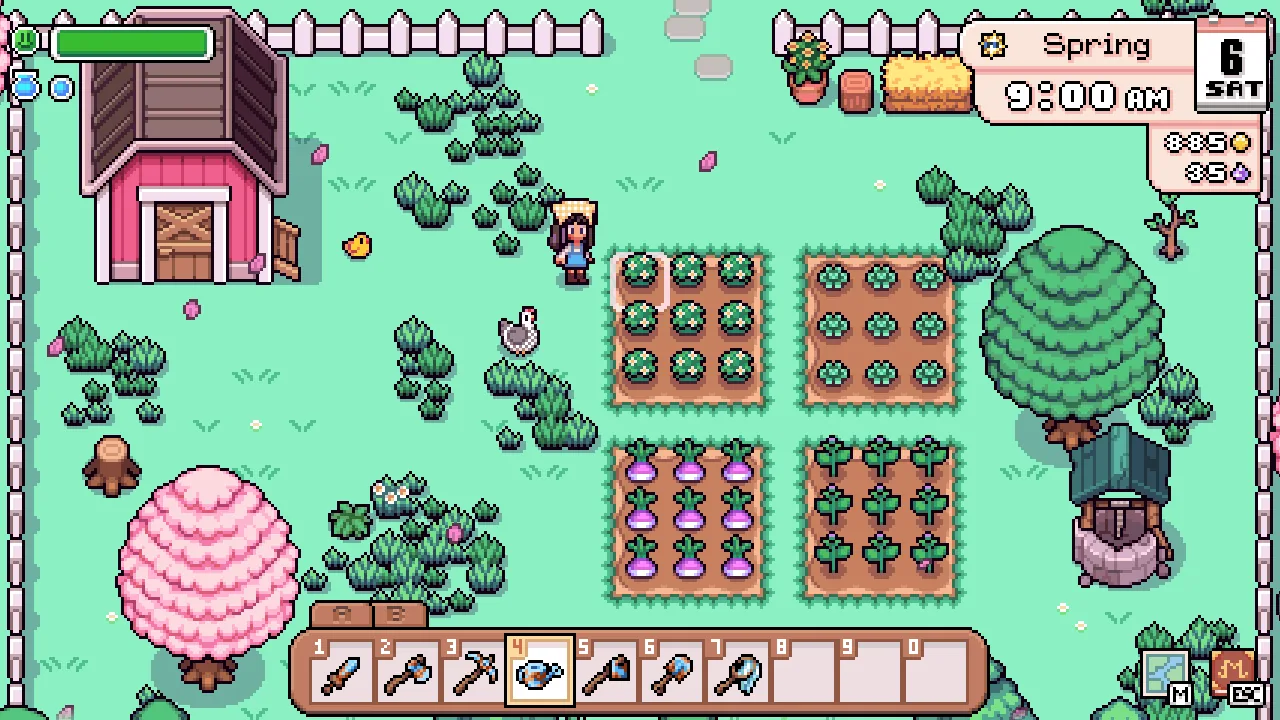
Crops are one of the most important repeating systems in Fields of Mistria, but the best farm is not necessarily the one with the largest field. A good 1.0 crop plan balances seasonal harvests, regrowing plants, museum donations, cooking ingredients, shipping goals, seed access, stamina, and the amount of time you want to spend watering every morning.
The basic rule is simple: most normal crops are seasonal, so check the calendar before planting and make sure there are enough days left for the crop to mature. Some crops produce once and need to be replanted, while others continue producing after their first harvest. Later progression also gives you tools such as the Seed Maker, which can turn eligible crops or forageables into more seeds and reduce how dependent you are on shop stock.
For wider planning, pair this page with the Fields of Mistria Calendar, Recipes and Cooking Guide, and Animals Guide. Completion-focused farms should also use the Museum Guide, while larger fields benefit from the Water Sprite Statue / Sprinklers Guide.
Fields of Mistria crop seasons at a glance
The current crop collection includes vegetables, grains, flowers, fruit trees, and other growable plants. The Almanac currently tracks dozens of growable entries rather than treating every farmable item as the same type, so it is useful to think in terms of seasonal field crops first and permanent or special plants separately.
Here are representative seasonal crops you will encounter while building a normal farm:
| Season | Common crop examples | Planning idea |
|---|---|---|
| Spring | Turnip, Potato, Cabbage, Strawberry, Carrot, Peas | Start with affordable crops, then add regrowing or higher-investment plants once cash flow improves. |
| Summer | Chili Pepper, Corn, Cucumber, Tomato, Watermelon | Reserve enough field space for crops you want to keep producing through the season. |
| Fall | Onion, Pumpkin, Sweet Potato, Wheat, Cranberry and other autumn crops | Combine cooking ingredients with museum and shipping goals before winter. |
| Winter | Cauliflower, Daikon Radish, Snow Peas and winter flowers | Farming does not stop in winter, so keep a real planting plan instead of abandoning the field. |
This table is intentionally a planning overview rather than a claim that these are the only crops in each season. Fruit trees, flowers, special seeds, forageables, and progression-dependent stock expand the farming collection considerably.
One-time crops versus regrowing crops
The distinction between a single-harvest crop and a regrowing crop matters more than simply comparing sale prices.
A single-harvest crop disappears after harvesting and normally requires another seed if you want to grow it again. These crops are easy to rotate and are useful when you are near the end of a season because you can choose a crop whose growth period fits the remaining days.
Regrowing crops remain planted after the first harvest and can produce again after their regrowth interval. They usually reward early-season planting because every extra harvest improves the value of the original seed and the tile it occupies. If you buy a regrowing crop late in the season, however, you may pay for a feature you never have enough time to use.
That leads to a practical rule: plant long-term and regrowing crops early; use faster one-time crops to fill gaps later in the season.
Older guides can also contain outdated behavior. For example, NPC Studio previously fixed Chickpeas so they correctly regrow according to their seed description. When an old spreadsheet conflicts with your current seed description, use the current 1.0 game information rather than assuming an Early Access behavior is still correct.
Where to get seeds
The General Store is the obvious source for seasonal farming supplies, but it is not the only seed source you should care about.
After completing the Upgrade the Carpenter's Shop story quest, Balor's Wagon can stock a random selection of seeds. An important advantage is that this seed selection can appear regardless of the current season, although the stock is random. That makes Balor useful when you need a seed outside its normal seasonal shop window or when you are collecting rather than simply planting the current best field.
Later progression adds an even more useful tool: the Seed Maker. NPC Studio added it as functional furniture purchasable after upgrading the General Store. Put a valid crop or forageable into it and it produces 1–3 seeds of the same type.
The Seed Maker changes how you should think about valuable crops. Instead of automatically selling every harvest, consider whether sacrificing one item for seed production helps you expand next season's planting stock. This is especially useful when the seed itself is inconvenient to obtain.
How to plan a profitable farm without turning the game into a spreadsheet
There is no single “best crop” for every save because profit depends on more than the sell value of one harvest. A useful calculation needs to consider:
- seed cost;
- days to first harvest;
- whether the crop regrows;
- days between later harvests;
- remaining days in the season;
- whether you need the crop for cooking, quests, museum sets, gifts, or shipping;
- how much field you can realistically water and harvest.
A theoretically profitable field can actually slow your progression if it consumes your entire morning and leaves no time for the Mines, relationships, fishing, quests, or gathering materials.
For a new season, start with a manageable field. Plant a mix of crops needed for collection or cooking, then dedicate the remaining space to your preferred money crop. Once watering becomes easier, scale up rather than starting with a huge field on Day 1.
Watering and farm automation
Crops normally need regular watering, so field size should follow your watering capacity. The early game rewards compact layouts because you spend less time walking between disconnected plots and less stamina maintaining decorative empty rows.
As your Farming progression improves, perks and magical tools make planting and watering easier. One useful perk interaction documented for planting is Green Thumb, which can sometimes water the targeted soil when you plant a seed. Superb Sower lets you charge seeds to spread them across a wider area, reducing repetitive planting on larger farms.
For permanent watering infrastructure, the game's Water Sprite Statues fill the search intent players often describe as “sprinklers.” The normal statue covers a 5×5 planning grid and the Large Water Sprite Statue expands that to 7×7 after the relevant perk. See the Sprinklers and Water Sprite Statue Guide before committing to a large field layout.
Do not design an enormous late-game farm before you have the tools to maintain it comfortably. Expand in stages: first make the field easy to water manually, then redesign around upgraded tools, perks, magic, and any automation you unlock.
There is also an unusual 1.0 exception worth knowing: the official 1.0 patch notes state that your crops are automatically watered during March's 8-Heart Event. It is a quality-of-life safeguard for that event, not a general daily farming automation system.
Crops, cooking, and recipes
Selling everything directly is rarely the most flexible strategy. Crops are ingredients for the game's large cooking system, and 1.0 made previously inaccessible cooking recipes obtainable in-game. Keeping a small ingredient reserve means you can respond to recipes, requests, gifts, and progression goals without waiting an entire season to regrow something.
A practical storage rule is to keep at least one or a small stack of unfamiliar crops until you know what you need. Once your pantry is established, sell the surplus or use it for seed production and cooking.
See the Fields of Mistria Recipes Guide for kitchen tiers, recipe sources, Cooking Skill progression, and ingredient planning.
Crops and the Museum
Seasonal crops also matter to collection progress. If you are trying to complete the Museum, check the Flora Wing before shipping your only copy of a new seasonal crop. Missing one donation can force you to wait until the crop becomes available again.
The safest routine is:
- harvest a new crop;
- check whether the Museum needs it;
- reserve anything required for quests or cooking;
- then sell, process, gift, or place the remaining harvest into the Seed Maker.
This matters even more in a completion-focused 1.0 save because the Museum is now fully completable. Use the Museum completion guide to coordinate Flora donations with Fish, Insects, Archaeology, Honey Set, and Terrarium Treasures progress.
Crops, Apiaries, and Terrariums
Seasonal storage becomes more valuable after you unlock the farm processors introduced in Major Update 4. Apiaries and Terrariums periodically request seasonal crops or forageables before producing their output. If you ship every last flower or crop at the end of a harvest, you can create an avoidable delay when one of those machines asks for it later.
Keep a modest seasonal reserve rather than hoarding everything. Apiaries turn Bee groups into Honey tiers needed for the Museum Honey Set, while Terrariums turn duplicate non-Bee insects into Fish Bait or Bug Pheromones that can help target missing collection entries. This creates a useful late-game loop: farming supports processors, processors support Museum completion, and Museum donations contribute to broader progression.
A simple seasonal farming routine
On Day 1 of a season, visit the seed shops and decide which crops must be planted early. Prioritize regrowing crops and anything with a long first growth cycle. Leave some open tiles rather than spending every Tessera immediately.
During the middle of the season, replace harvested single-use crops with plants that still have enough time to mature. Use the Seed Maker when reproducing a hard-to-find seed is more valuable than selling that individual crop. Keep one eye on the Calendar so festivals, birthdays, dates, and quest days do not collide with an oversized farming workload.
During the final week, stop planting crops that cannot mature before the season changes. Shift time toward harvesting, cooking, Museum cleanup, seed preparation, and organizing the farm for the next season.
Common crop mistakes
Planting too late. Always compare the remaining season length with the crop's growth time before using an expensive seed.
Selling the first harvest of everything. Museum donations, recipes, quests, gifts, and seed production can make one saved crop more useful than its immediate sale price.
Ignoring regrowth. A regrowing crop planted early can generate several harvests; planted late, it may only produce once.
Building a field larger than your watering capacity. Farming should support the rest of the game rather than consume the entire day.
Using an old Early Access profit table as permanent truth. Patch changes, perks, seed access, and your progression can change the real value of a planting strategy.
Fields of Mistria crops FAQ
Can you grow crops in winter?
Yes. Winter has its own growable crops and flowers, so the farm does not need to become inactive when Fall ends.
Do all crops need to be replanted?
No. Some crops are single harvests, while others regrow after the first harvest. Check the seed description before planning how many seeds you need.
How does the Seed Maker work?
The Seed Maker is purchasable after the General Store upgrade. It accepts a valid crop or forageable and produces 1–3 seeds of that same type, making it useful for building future planting stock.
Should I sell crops or cook with them?
Do both, but keep a reserve first. New crops can be relevant to Museum sets, recipes, requests, gifts, seed production, Apiary requests, and Terrarium requests. Sell the surplus once your collection and ingredient needs are covered.
What is the best crop in Fields of Mistria?
There is no universal answer. A crop's practical value depends on seed cost, growth time, regrowth, how many days remain in the season, your watering capacity, and whether you need the harvest for something besides money.
Related guides
- Fields of Mistria Calendar — festivals, birthdays, and seasonal planning.
- Fields of Mistria Recipes — turn farm ingredients into useful dishes.
- Fields of Mistria Animals — plan the ranching side of your farm.
- Sprinklers / Water Sprite Statues — automate larger crop layouts.
- Apiary and Honey — use seasonal items to produce Museum honey tiers.
- Terrarium Guide — turn duplicate insects into targeted collection tools.
- Museum Guide — coordinate seasonal donations before selling first copies.
- Fields of Mistria 1.0 Guide — full-release systems and returning-player progression.
- Fields of Mistria Achievements — plan completion goals alongside farming.